
Which electric heating mat should you choose?
Start with your floor design, the heat output needed and the area you plan to heat. Floor build-up means the layers under your finished floor. Then compare S-Mat 150 and SH-Mat 200 and select a listed mat size that fits the layout.
The two ranges differ in power, cable thickness and wiring. Higher output does not mean higher efficiency. Check the product against your floor construction and electrical requirements before ordering; the comparison below shows the differences.
How electric heating mats work
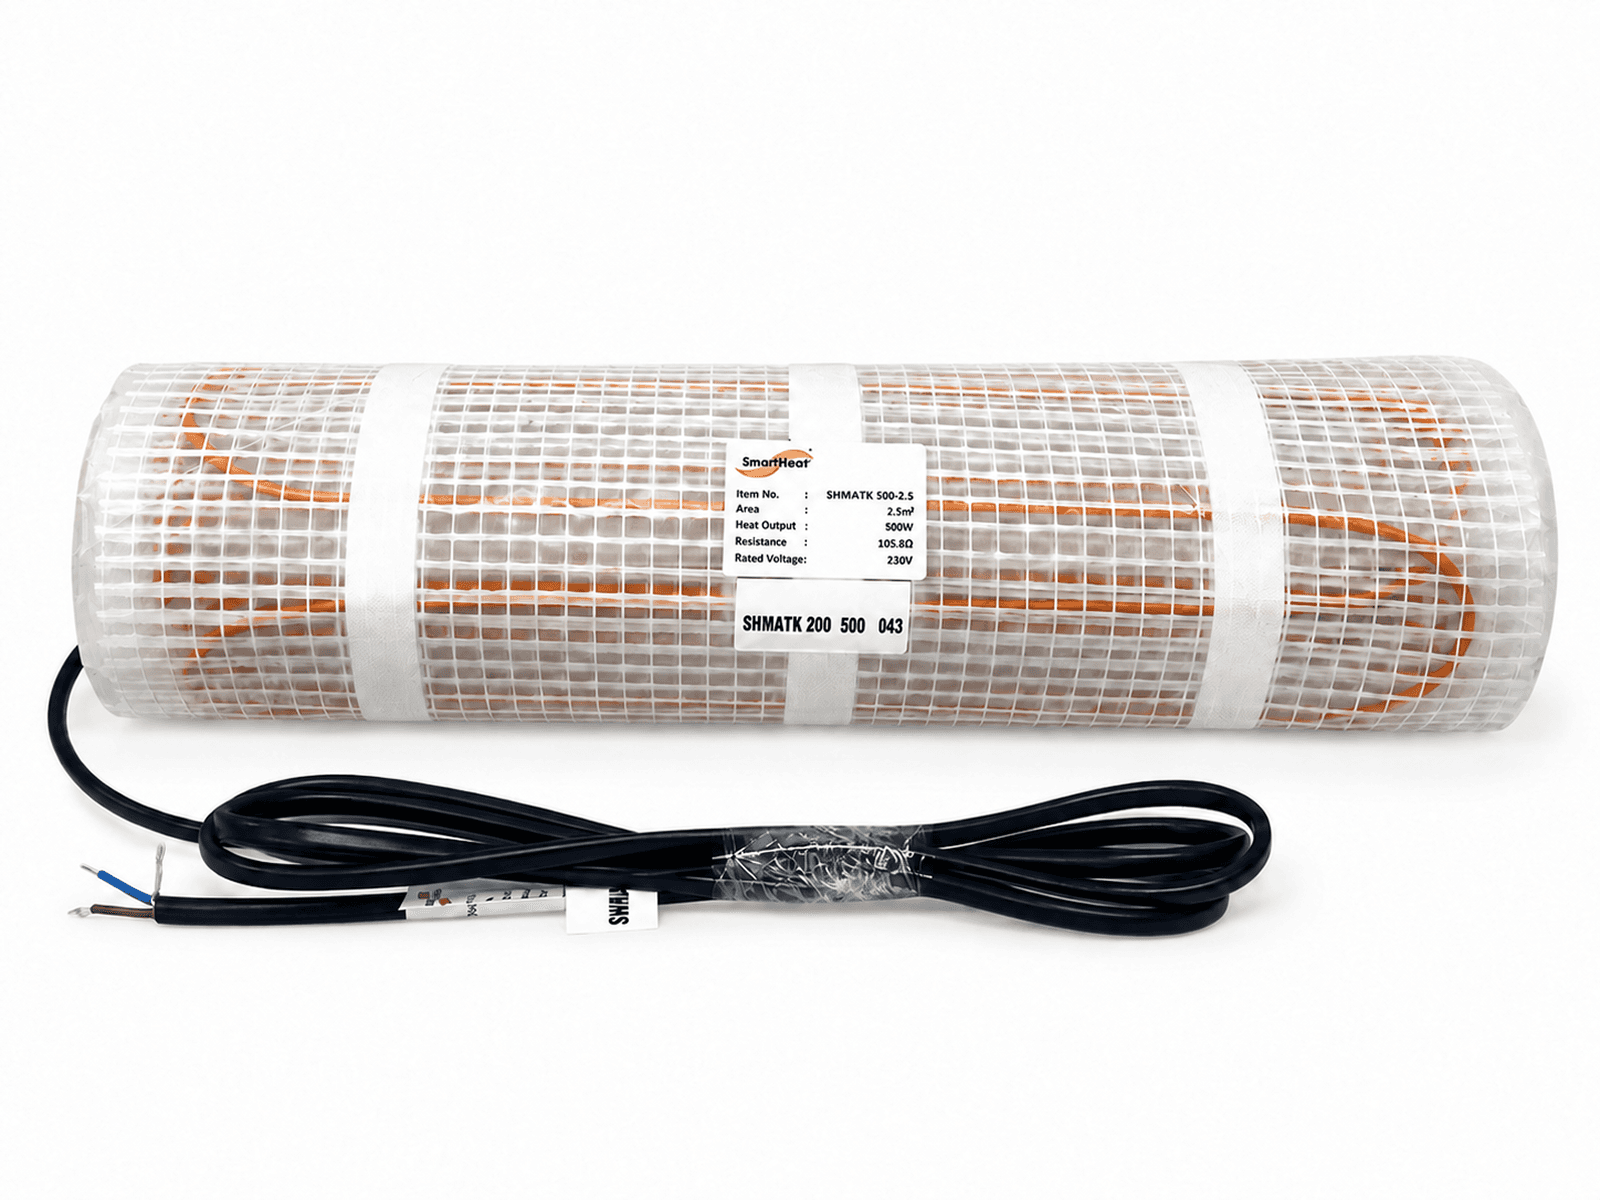
Each mat has a heating cable attached to self-adhesive mesh. It sits in the floor layer specified for that product and works with a suitable thermostat and floor sensor. Start by confirming the floor design, heated area and required output, then choose the controls and accessories.
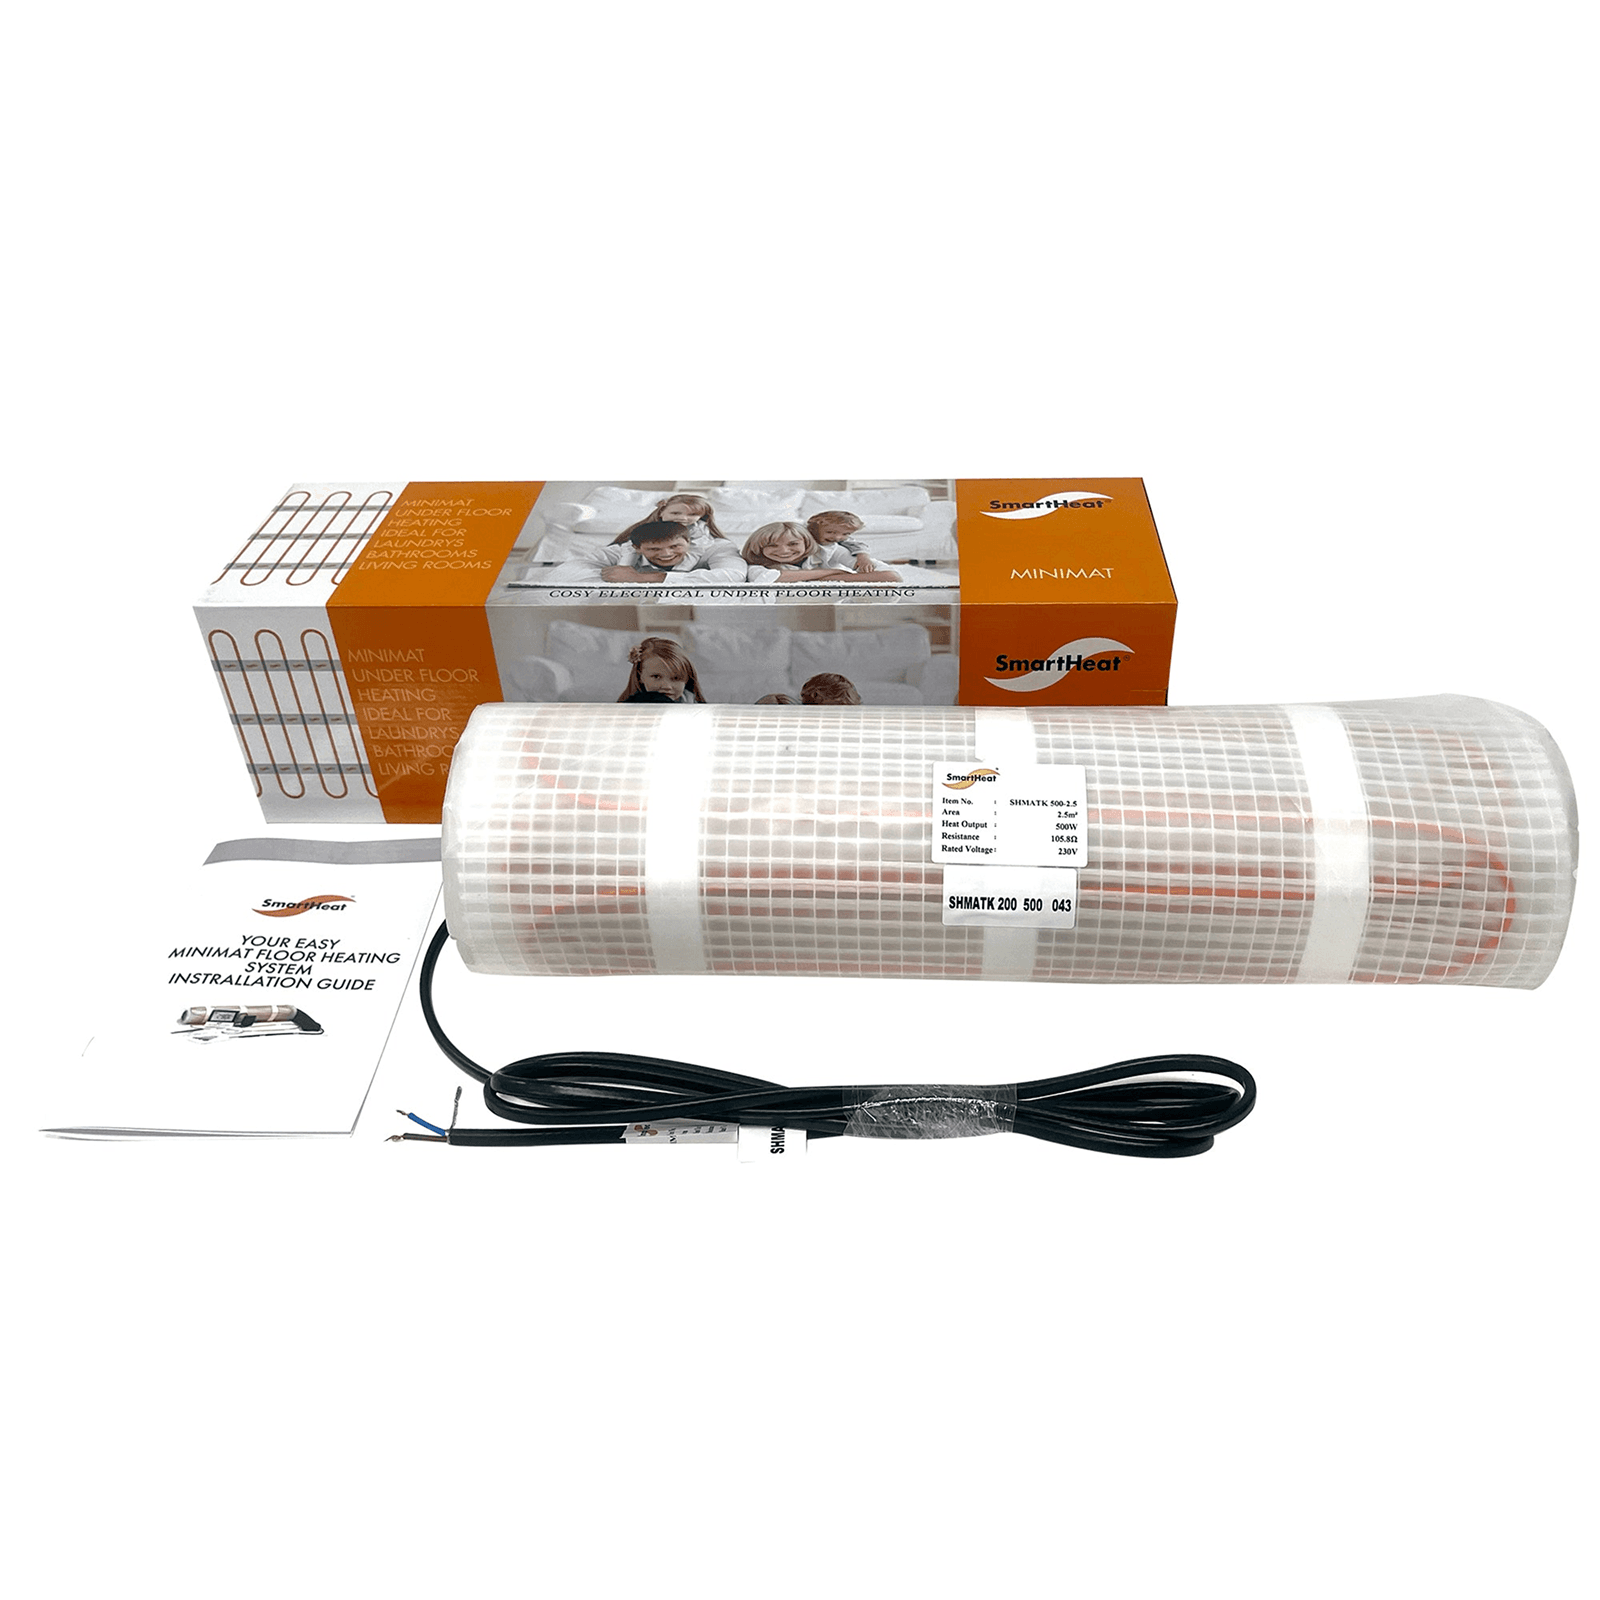
SmartHeat heating mat kit
Heating mat with Wi-Fi thermostat, floor sensor, Screamer warning device and wall mounting box. Contents depend on the selected package.
Compare S-Mat 150 and SH-Mat 200
| Feature | S-Mat 150 | SH-Mat 200 |
|---|---|---|
| Output density | 150 W/m² | 200 W/m² |
| Cable diameter | 2.5 mm | 5 mm |
| Cable construction | Single conductor | Twin conductor |
| Mat carrier | Adhesive-backed mesh | Adhesive-backed mesh |
| Connection | Two point | Single point |
| Available heated areas | 1–12 m², in listed sizes | 1–12 m², in listed sizes |
Plan the complete floor build-up
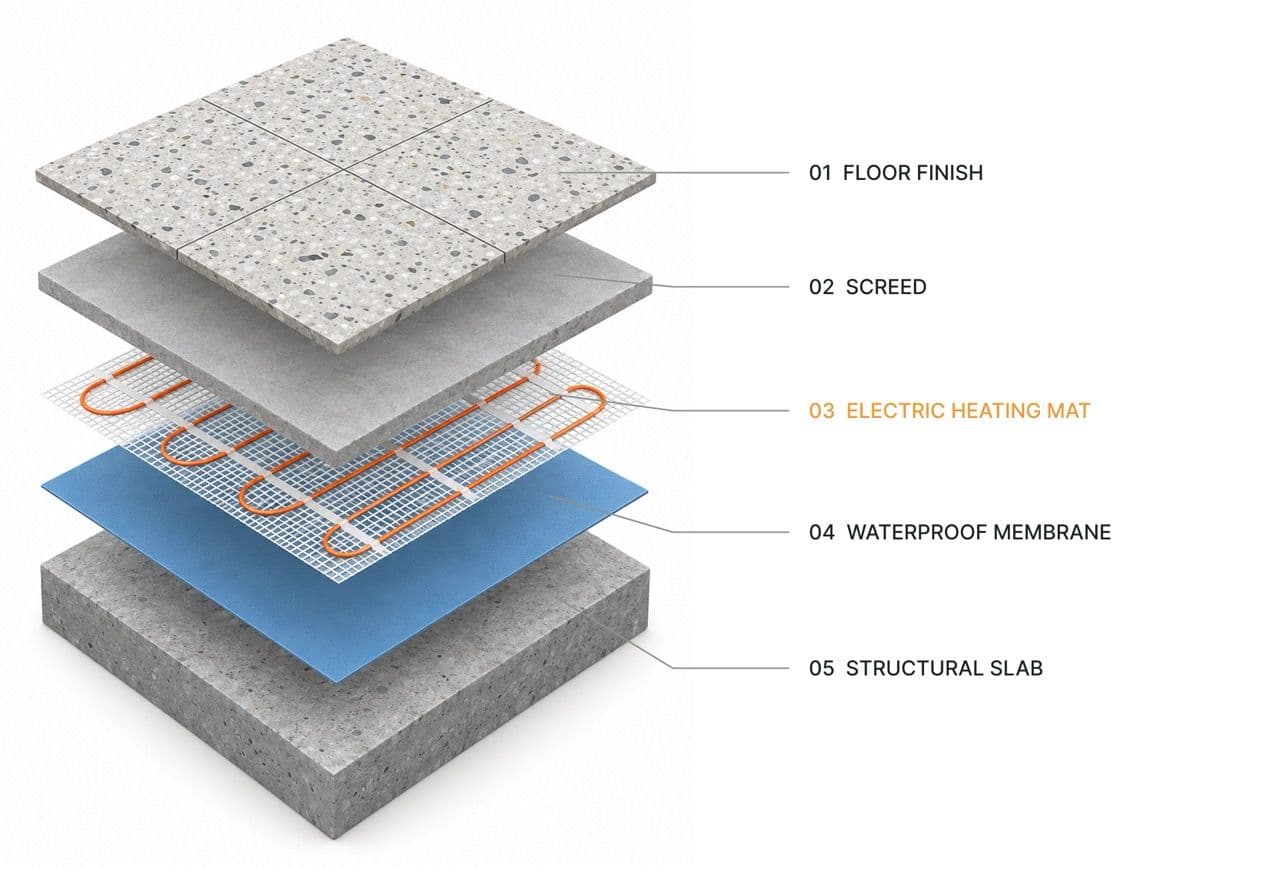
Plan the heating mat together with the floor finish, adhesive or screed, controls, waterproofing and any layers needed to reduce sound.
Cable thickness is only one part of the finished floor height. Allow for the adhesive or screed, floor finish and cable connections too.
The drawing shows a floor finish, screed, heating mat, waterproof membrane and structural slab. It is an example: the mat position and the order of the layers must follow the selected product's instructions and your floor design.
Confirm the full floor layout before installation, including any waterproofing or sound-reducing underlay.
Floor construction concept
Floor finish, screed, electric heating mat, waterproof membrane and structural slab. Concept illustration only; the mat is embedded in the specified layer. Waterproofing position and final build-up must follow the project design.
Understand in-screed and under-tile arrangements
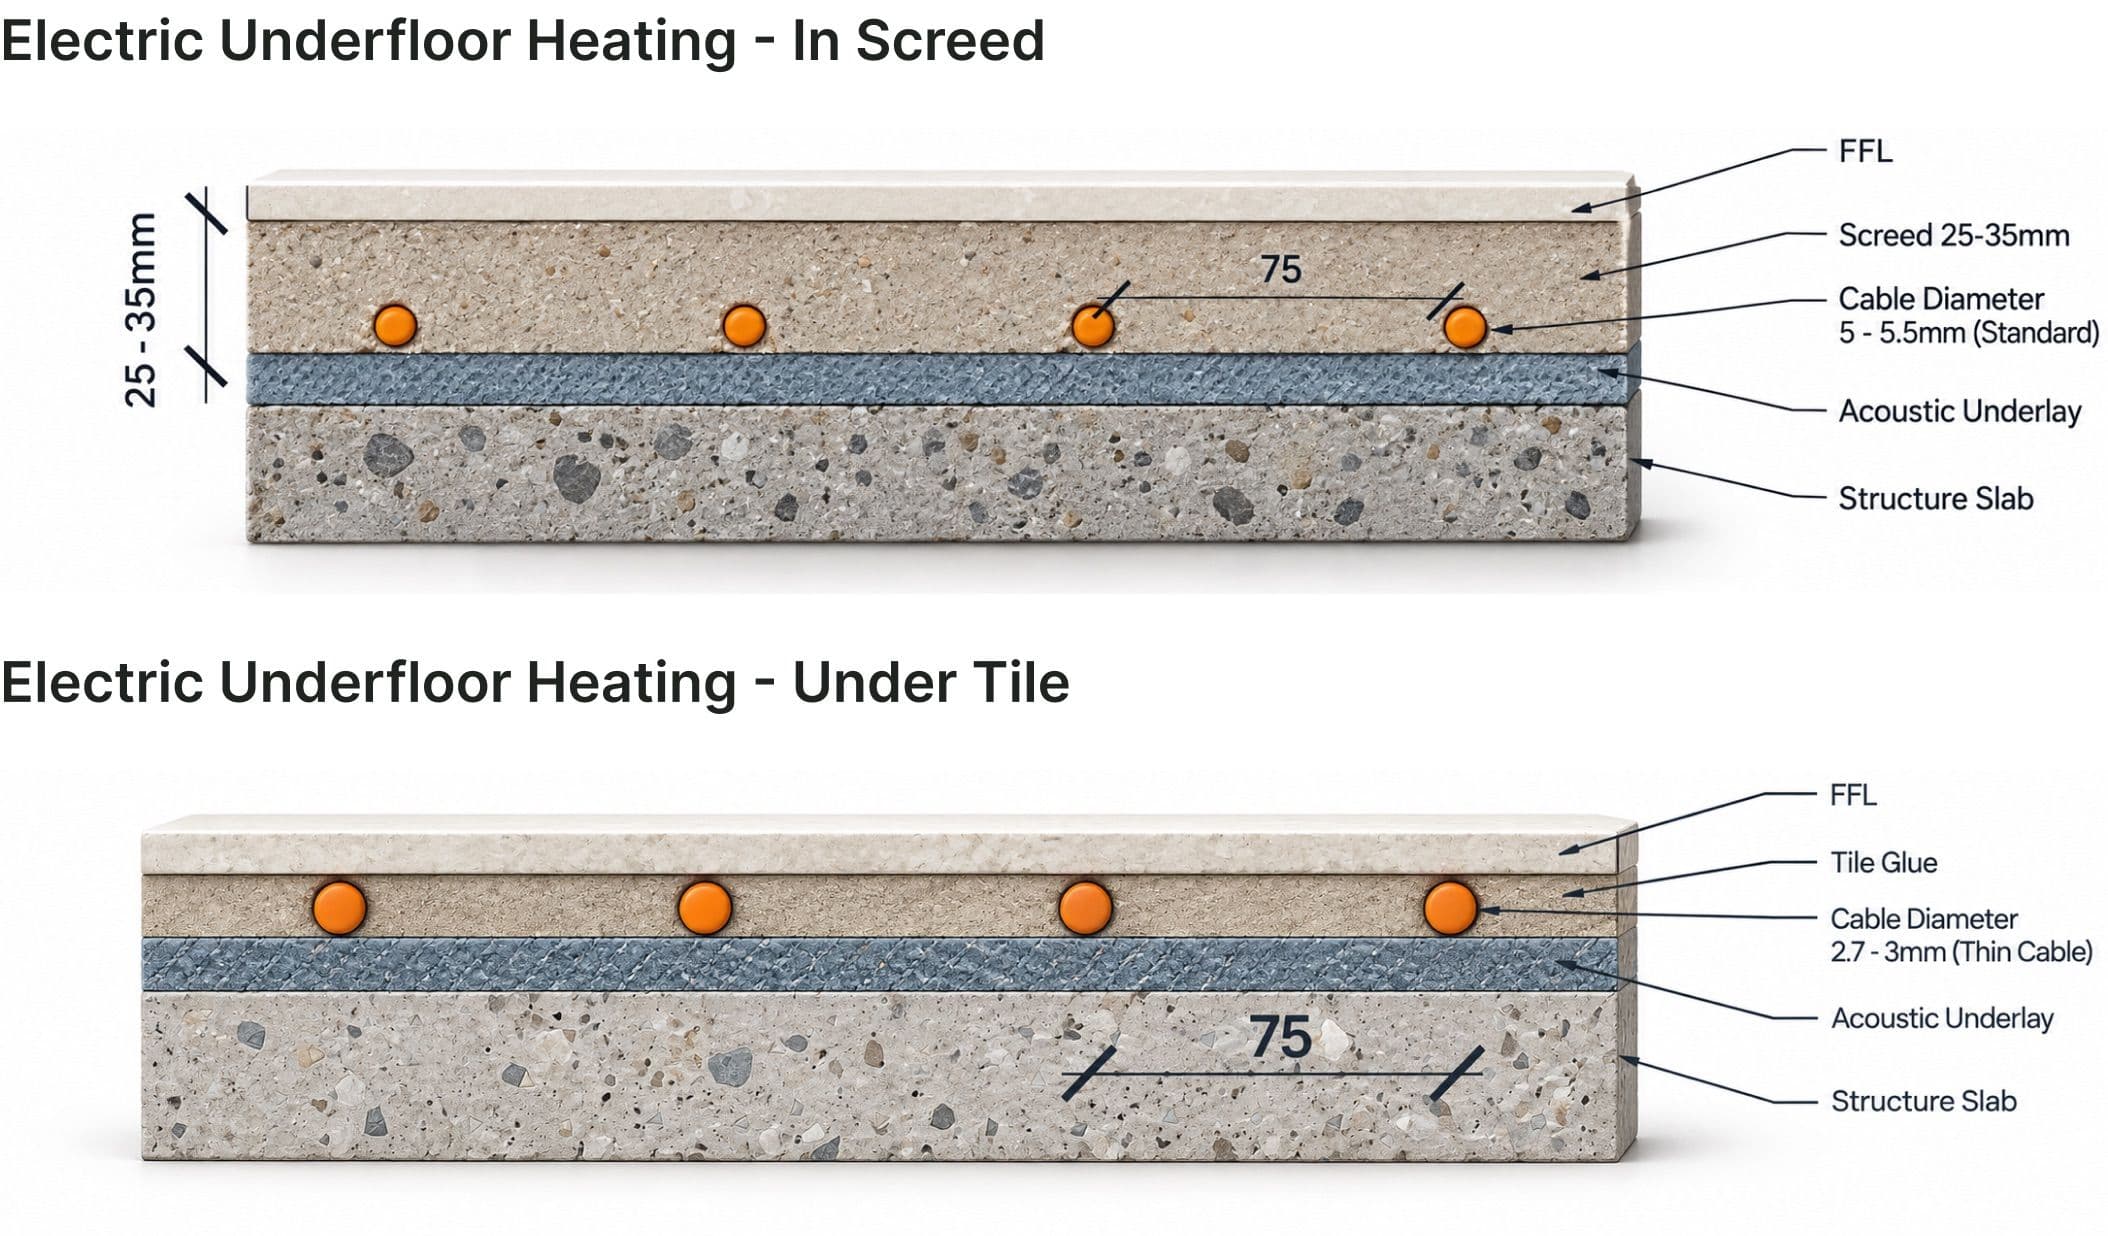
In-screed heating sits within the screed layer, while under-tile heating sits in the tile adhesive directly beneath the floor finish. The right arrangement depends on your floor design and the selected heating system.
Work out the heated area before choosing a size
The heated area is the part of the floor covered by the heating mat. It may be smaller than the full room area. Show fixed cabinetry, baths and other fixtures on your plan so the layout, required clearances and any areas to leave unheated can be confirmed against the selected product's instructions.
For example, an 8 m² room might have a confirmed heated area of 5 m². Use that 5 m² area when checking the listed mat sizes. The mat layout must also fit the room shape and connection position; area alone does not confirm a fit.
Both ranges use 0.5 m-wide mats, with lengths varying by heated area. Confirm the mat layout before choosing the product reference.
How to read a mat reference
A mat reference gives the total output in watts followed by the heated area in square metres. SHMAT 750-5.0 is a 750 W mat covering 5 m² in the S-Mat 150 range. The 5 m² SH-Mat 200 option is SHMAT 1000-5.0, rated at 1,000 W.
These are rated outputs, not a running-cost estimate. Energy use also depends on how long the heating runs, the floor construction, insulation and temperature settings.
Choose a mat-only product or kit
SHMAT identifies a mat-only product. SHMATK identifies a kit. For example, the kit reference corresponding to SHMAT 150-1.0 is SHMATK 150-1.0.
The brochure's Wi-Fi thermostat kit includes:
- Heating mat
- Wi-Fi thermostat
- Floor sensor
- Screamer warning device
- Wall mounting box
Contents apply to the selected package. Confirm the thermostat, sensor and accessories when ordering; mat-only products are supplied separately.
Before you order
- Confirm the heated area and selected mat range.
- Match the area to a listed mat reference and output.
- Check compatibility with the proposed floor finish.
- Confirm the complete floor build-up, including waterproofing or acoustic layers where required.
- Select the thermostat and floor sensor.
- Confirm whether you need a mat-only product or a kit, and check the supplied accessories.
- Follow the product installation instructions and arrange the electrical connection with a licensed electrician.
If you need help planning beyond the mat selection, explore SmartHeat's electric heating and project delivery services before finalising the floor assembly.
S-Mat 150 sizes
| Heated area (m²) | Mat reference | Mat size (m × m) | Output (W) |
|---|---|---|---|
| 1.0 | SHMAT 150-1.0 | 0.5 × 2 | 150 |
| 1.5 | SHMAT 225-1.5 | 0.5 × 3 | 225 |
| 2.0 | SHMAT 300-2.0 | 0.5 × 4 | 300 |
| 2.5 | SHMAT 375-2.5 | 0.5 × 5 | 375 |
| 3.0 | SHMAT 450-3.0 | 0.5 × 6 | 450 |
| 3.5 | SHMAT 525-3.5 | 0.5 × 7 | 525 |
| 4.0 | SHMAT 600-4.0 | 0.5 × 8 | 600 |
| 5.0 | SHMAT 750-5.0 | 0.5 × 10 | 750 |
| 6.0 | SHMAT 900-6.0 | 0.5 × 12 | 900 |
| 7.0 | SHMAT 1050-7.0 | 0.5 × 14 | 1050 |
| 8.0 | SHMAT 1200-8.0 | 0.5 × 16 | 1200 |
| 9.0 | SHMAT 1350-9.0 | 0.5 × 18 | 1350 |
| 10.0 | SHMAT 1500-10.0 | 0.5 × 20 | 1500 |
| 12.0 | SHMAT 1800-12.0 | 0.5 × 24 | 1800 |
Scroll horizontally to compare all models.
SH-Mat 200 sizes
| Heated area (m²) | Mat reference | Mat size (m × m) | Output (W) |
|---|---|---|---|
| 1.0 | SHMAT 200-1.0 | 0.5 × 2 | 200 |
| 1.5 | SHMAT 300-1.5 | 0.5 × 3 | 300 |
| 2.0 | SHMAT 400-2.0 | 0.5 × 4 | 400 |
| 2.5 | SHMAT 500-2.5 | 0.5 × 5 | 500 |
| 3.0 | SHMAT 600-3.0 | 0.5 × 6 | 600 |
| 3.5 | SHMAT 700-3.5 | 0.5 × 7 | 700 |
| 4.0 | SHMAT 800-4.0 | 0.5 × 8 | 800 |
| 4.5 | SHMAT 900-4.5 | 0.5 × 9 | 900 |
| 5.0 | SHMAT 1000-5.0 | 0.5 × 10 | 1000 |
| 6.0 | SHMAT 1200-6.0 | 0.5 × 12 | 1200 |
| 7.0 | SHMAT 1400-7.0 | 0.5 × 14 | 1400 |
| 8.0 | SHMAT 1600-8.0 | 0.5 × 16 | 1600 |
| 9.0 | SHMAT 1800-9.0 | 0.5 × 18 | 1800 |
| 10.0 | SHMAT 2000-10.0 | 0.5 × 20 | 2000 |
| 12.0 | SHMAT 2400-12.0 | 0.5 × 24 | 2400 |
Scroll horizontally to compare all models.
For the product specifications and warranty summary, download the SmartHeat electric heating mats brochure (PDF). Check the installation instructions and full warranty terms for your selected product before ordering.
Frequently asked questions
Frequently asked questions
Does 200 W/m² mean the mat is more efficient?
W/m² describes output density rather than efficiency. Energy use also depends on operating time, insulation, floor construction and temperature settings.
Does a 2.5 mm cable add only 2.5 mm to the floor height?
Cable diameter alone does not determine the finished floor height. Allow for the specified adhesive or screed, floor finish and connection details.
Is a thermostat included with every mat?
Kit contents depend on the selected package. Mat-only products are supplied separately, so confirm the controls and accessories before ordering.
Which installation arrangement should I use?
Confirm the arrangement for the selected product and floor design. The brochure shows both in-screed and under-tile examples, but these do not replace the product's installation instructions.
Check the product details before ordering
S-Mat 150 kit
Check the listed sizes and included controls for the S-Mat 150 Wi-Fi thermostat kit.
SH-Mat 200 kit
Check the listed sizes and included controls for the SH-Mat 200 Wi-Fi thermostat kit.
S-Mat 150 mat only
Review the mat-only product and confirm the controls and accessories required separately.
SH-Mat 200 mat only
Review the mat-only product and confirm the controls and accessories required separately.